Friday, March 16, 2012

More fun in Z scale. Also, a cat.

Just to see how it would turn out, I decided to knock together a Z-scale three-dome tank car from the tube stock and assorted bits and pieces I ordered a while back. I've come to the conclusion that it'll be entirely too much trouble to build every single car from scratch, so I'm focusing instead on building individual cars only until I get one of each type that is good enough to reproduce. Once I've accomplished that, I'll make a mold of each prototype and cast the rest out of resin.

That approach offers several advantages over my original plan. First, it gives me a lot more freedom to experiment and refine my technique; I have enough materials on hand to build five of each type of car I had planned, and if I got my hands on a few more end caps for the tanks I could stretch that to eighteen. Second, it reduces the overall workload since after the first workable model is done the rest will only require final assembly (application of handrails, ladders, brakewheel, etc). Third, it opens up the possibility of making more cars than I need for my own purposes and selling the extras to offset the cost of the project.

Advantage #3 can safely be stowed in the 'counting chickens before they're hatched' department for now. This is, after all, my first attempt at serious modeling, and at this point I'd be foolish to hope that what I'll come up with will be up to the standards set by other Z-heads. Some of them set the bar pretty high, and all of them have a great deal more experience.

Still, I'm very optimistic based on my progress so far. Working entirely with hand tools and eyeballing most of the measurements, my biggest mistake thus far has been setting the center dome half a millimeter off-center. Unfortunately, that mans I didn't get it right on the first try. The spacing between domes has to be accurate; as it stands the gap between the first and second domes is 5mm while the gap between the second and third is 6mm. The difference works out to several scale feet, and it is noticeable when viewed from the side.

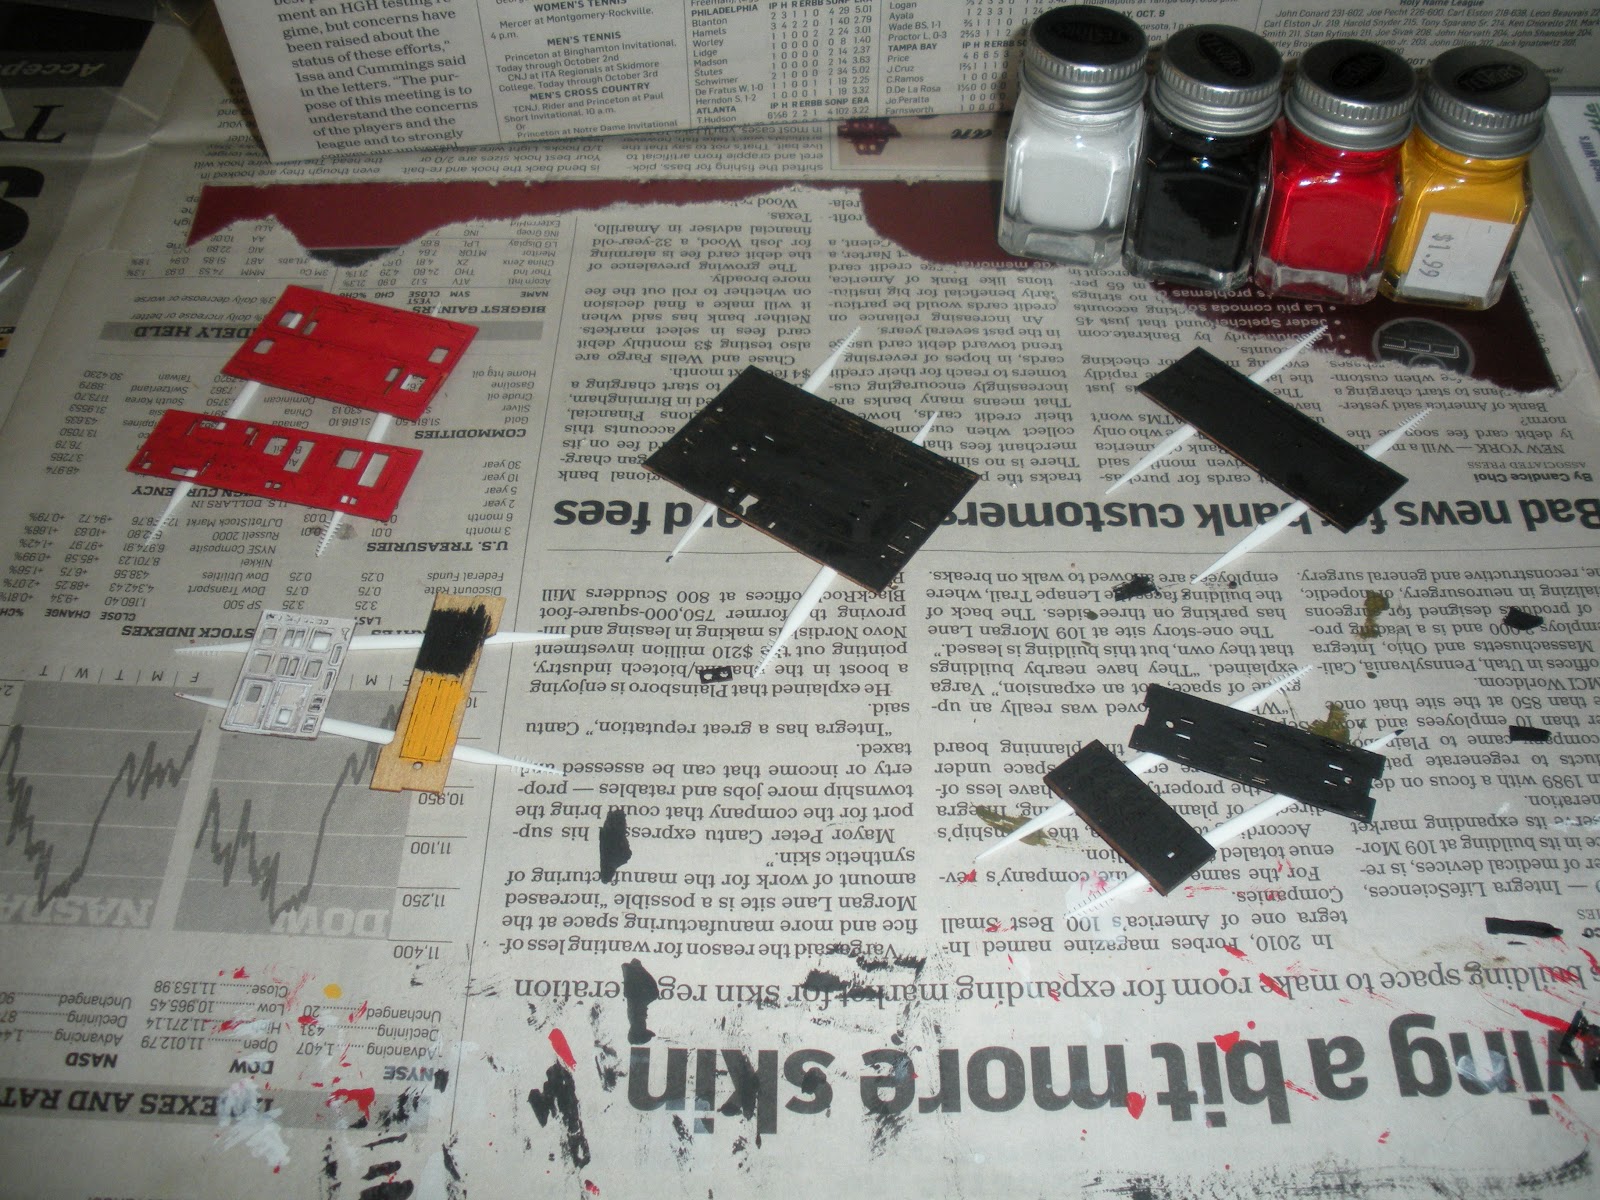
Here are a few fuzzy pictures that I took with my ipod:

The tank braces look a bit thick as well, but I can live with that as they'll be much less visible once the chassis is complete. I added a spine (structurally unnecessary but realistic), and since these pictures were taken I've sanded down the tank braces to be flush with the spine. I've glued on the first part of the walkways that run around the tank. Once all four walkway pieces are glued in place, I'll add cross bracing and glue on the truck bolsters. The final step will be the addition of a brakewheel, handrails around the tank, ladders on either side, and inspection walkways just below the domes.

I haven't figured out what to do about the dome caps yet. I may have to do for those what I intend to do for the entire run of cars- that is, experiment until I get one that looks right then cast a whole bunch to glue on. Since those parts don't interfere with the rest of the build, they can be left off until I get them figured out.

Even though this particular prototype is defective, I still intend to finish it. I already have a few ideas on how to improve the design (using L-beam stock for the chassis instead of bar stock, for example), but getting a perfect result is likely to involve a bit of luck. The holes in which the domes are mounted, while drilled along the centerline (credit to my good eyesight), were also drilled using a Dremel tool... hence the little 'whoopsie' with the spacing of the center dome relative to the other two. I don't have a drill press, so there's no real way around the issue other than trial and error. Everything else about the design I fully expect to improve with each attempt, but the drilling is still a concern.

On the other hand, I'm having loads of fun with this. Here's a completely irrelevant picture of my cat.


Friday, February 3, 2012

Building really small stuff, part 2

Caboose kit assembly pictures (large images). The half-painted miniatures in the background in some of the images are for a tabletop game called Starsiege: Rebellion.

Pre-assembly painting:


Beginning the assembly (underbody glued and clamped):


Walls attached:


...and doors:


Hand provided for size comparison:


Window frames installed (now that was a pain in the ass):


Interior completed:


...and finally the roof goes on:
 That, unfortunately, was where I had to stop. The stairs that attach to the end platforms of the caboose broke (which is to say they more or less disintegrated) when I tried to detach them from the sprue, so I need to find or fabricate replacement parts before I can finish the kit. There are a few other detail parts that also need to be attached yet (lights, hand rails, and the framing on the roof), but since I couldn't finish anyway I decided to take a break.

Tally of mistakes so far: 3.

1- The directions said to paint everything before assembly. The paint I used was absorbed into the wooden parts, which expanded. As a result, the tolerances were a bit off and I had to trim a few things down before they would set in place (such as the pain-in-the-ass window frames). The wood expanding is also most likely why the stairs were so fragile. There are also a few gaps that need filling. It would have been easier (for me) to assemble first and use micro-brushes to paint the completed kit.

2- I used way, way too much glue. I have a bad habit of doing that. While it hasn't ruined anything, I had to do a few more touch-ups to the paint (another reason I should have assembled before painting) and slightly marred the window panes.

3- I used Crazy Glue. Crazy Glue is entirely appropriate for use on wood and plastic; the kit is made of wood and plastic so I should have been fine. Crazy Glue, however, is apparently able to dissolve the Testors brand model paints which I used on the kit. Yet another reason why I should have glued before painting.

All in all, the mistakes I've made are minor ones and I think the finished caboose (while it won't look as nice as the show model) will turn out just fine. I've also learned a few very useful things about small-scale modeling that will come in handy when the rest of the materials for my tank car construction project arrive. In the meantime, I'm off to Florida for about two weeks to revisit Eckerd campus, go apartment hunting, and spend a bunch of time with a few of my closest friends.

Wednesday, February 1, 2012

On building really small stuff.

I mention trains as being among my many interests. Perhaps a better word than interest would be obsession, as I've been collecting assorted shapes and sizes of model trains, toy trains, and railroadiana (that's 'stuff associated with trains, railroads, and railfans' to the non-train people) since I was old enough to think. I got my first electric train set when I was six and I've been campaigning (unsuccessfully) for the space to build myself a railroad ever since.

Meanwhile, my collection has kept growing. Every single birthday, every holiday, every "Mommy/Daddy, pleeeeeeease?" and about a third of every dollar that has ever passed through my hands has contributed in some way to the addiction. Most of my friends have seen more of my gamer side because it's easier to find space for a computer than a model railroad. I have way more trains than I have games.

Hand-in-hand with my train nuttery walks a fascination with mechanical things. Watches, click-pens, guns, wind-up toys... you name it, I've probably fiddled with its gears and springs and gizmos at some point (in an entirely safe and responsible manner in the case of guns, I assure you). The smaller and more intricate the device, the more interesting it becomes. Thus, I settled on Z- 1:220th scale- as my model railroading focus. Being a 25-year-old in a hobby dominated by retirees (or at least stable and much better funded middle-aged folks) is odd enough, but I had to go and become a Z-head.

 Z scale is... special. Everything is tiny. Look at the shift key on your keyboard- that's about the size of a Z scale train car. They're not cheap either; because of the precision tooling needed to create parts for the models, and the smaller market for them, Z scale locomotives and rolling stock tend to be more expensive than equipment in larger scales with the same features and detail. Only a handful of manufacturers offer a comprehensive range of products- by which I mean there are just over a dozen affordable, mass-produced, ready-to-run, American-prototype locomotives (including the ones that have gone out of production) available to a Z-scale modeler compared to hundreds in larger scales.

The same limited selection applies to the entire range of Z scale accessories, from trees to street signs. Almost every available structure comes in kit form, which means good eyesight (or a good magnifier), good manual dexterity, and a good set of tweezers are pretty much requirements unless you want to spring for an obscenely overpriced pre-built layout. The kits are pretty expensive too, so getting things done in Z means either spending a lot of money or learning to scratch-build and kitbash- the latter word is a modeling term meaning 'to take bits and pieces of other models and create an entirely different model with them.'

Do not mistake any of that for complaining. I absolutely love this scale and all the challenges that come with it. I spent most of the evening painting a caboose kit made of fragile wood parts about as thick as a sheet of card paper, which I'm hoping to (mostly) assemble tomorrow. Earlier in the day I visited a hobby shop to look for styrene plastic tubing that I could use to build myself a set of tank cars from scratch, because I figured it would be a fun little project for the next few months (and because I worked out the math and realized I could build about half a dozen cars for the price of one ready-to-run model).

Yes, there will be pictures- if I remember to take any while I'm building. No, I haven't taken any yet because all they'd show are a few bits of red, black, and yellow wood and a whole bunch of plastic tubes. Here's what that caboose should look like when it's finished if I don't completely screw it up: 


I will be rather upset if I screw up (I've been practicing my skills on much, much cheaper stuff for months now), but it is a distinct possibility. The image of the finished product you see there is very enlarged. The image of the kit in its package is how big the parts I just finished painting actually are (those little green and red and white specks in the image on the left are the red, green, and white 'lights' on the end of the finished car in the other image). This is the sort of build that a badly timed sneeze could turn into something out of a Michael Bay movie.

I love really small stuff. :)